When we mention labels, we often think of printing them or their application. You might think that the biggest challenges are to print beautiful, readable and clear labels in color or black and white. Or even, that it is complicated to apply them perfectly on the packaging. This is true, but there is a step that is often overlooked and which is far more complex and technical than it seems: die-cutting.

Suppliers of blank labels often provide pre-cut rolls of labels. In this case, you can simply print “on the labels”, and then paste them. But in the labelling industry, it is quite the opposite! You must first print the labels on the rolls, and then die-cut out the label shapes.
The die-cutting of labels is actually a very complicated process which depends on many factors.
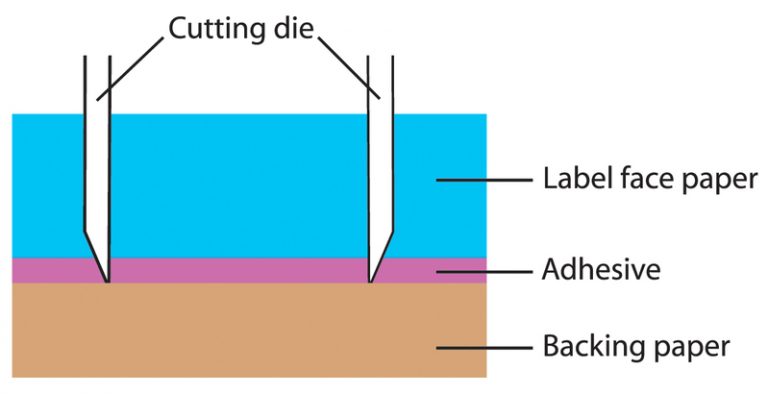
A label consists of three layers: a layer of paper on which it is printed, an adhesive layer, and a layer of backing paper that preserves the adhesive. The blades must therefore precisely cut the first two layers while preserving the third, and with sufficient pressure to ensure a perfect fit.
Of course, this is perfectly adjusted machinery put forth to deal with such a complex task. However, the difficulty is to ensure a perfect alignment and that the die-cutting is exactly where it should be. Small movements of the roller located in the machine can arrive and cause a shift. Machines now have a very small tolerance (up to less than 1 mm!), which makes it possible for an invisible shift in the majority of cases. But working with such a machine cannot completely eliminate this risk.
In other words, more than their printing or application, their die-cutting is a critical phase of label production. This is one of the steps that must be done perfectly to get the best possible results, and thus have an impact on the shelves.